Annotations
Here, annotation means any type of event-based data. Events can represent stages (N1, N2, R, W), respiratory events, or user-defined marks.
Annotation classes
The Annotations dock controls which event types are shown in the main viewer.
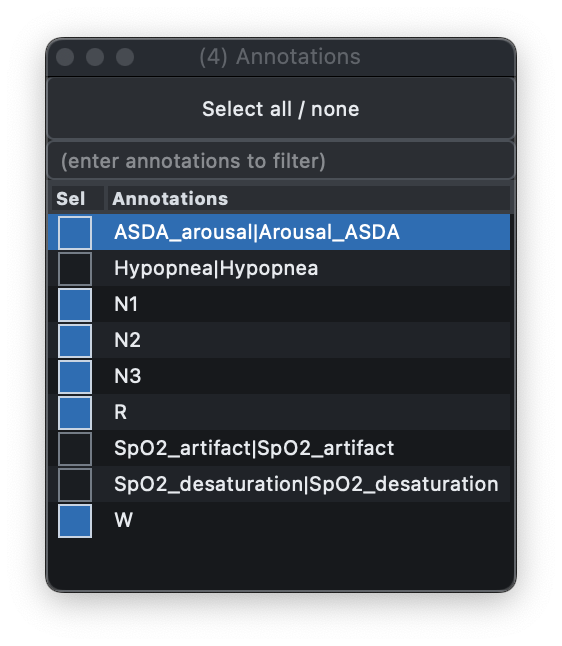
As in the Signals dock, you can:
-
toggle between selecting all or none
-
filter rows by typing a comma-delimited list of annotations
When an annotation class is selected, its instances appear in the Instances dock.
Instances dock
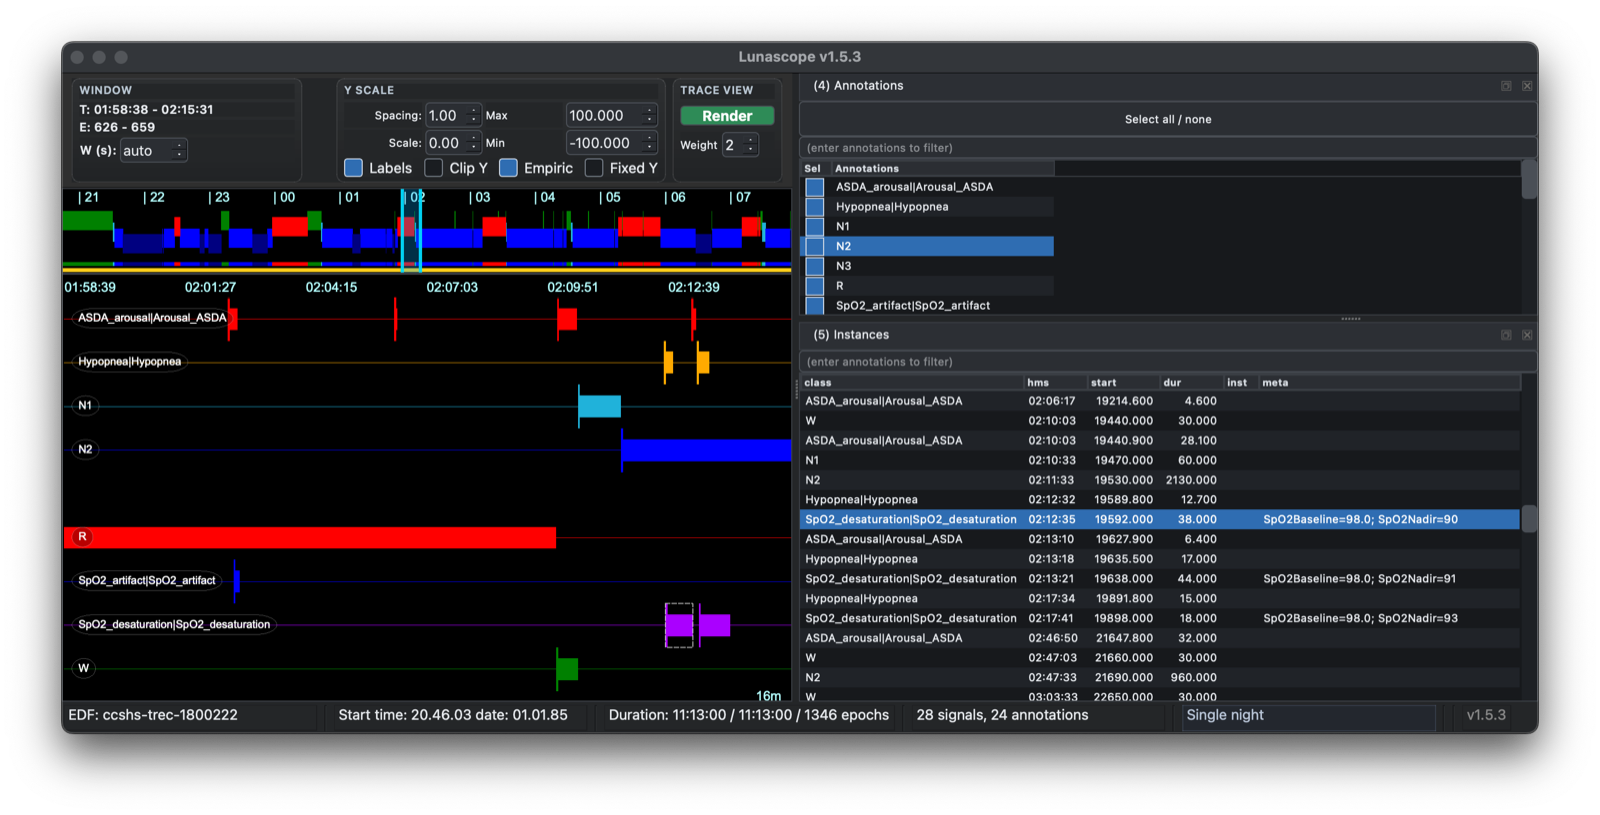
For selected annotation classes, the Instances dock lists all instances in clock-time order, along with event onset and duration in seconds.
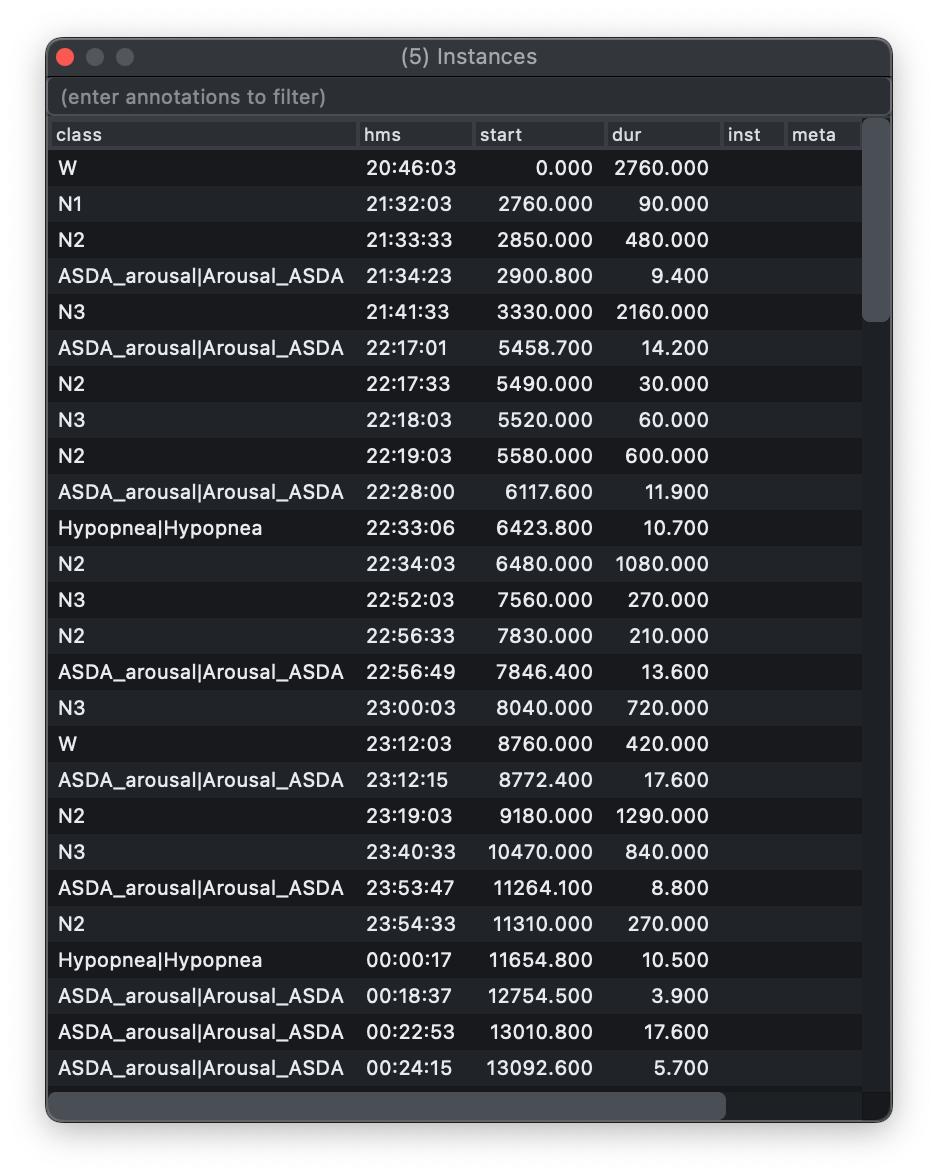
Selecting an event moves the main viewer to that point in the record, so the table doubles as a navigation tool.
You can also filter which instances are displayed in this table (based on annotation class) by typing a comma-delimited list of terms, as in the example above that restricts displayed rows to wake (W) and artifact events.
If the source annotations carry per-event metadata, Lunascope also shows
that information in a meta column. This preserves key/value text from
the underlying annotation file, making it easier to inspect event-level
details without leaving the GUI.
Windowing
When you jump to an annotation from the Instances dock, the main viewer centers on that event. The W (s) control in the top-left window panel determines how much surrounding context is shown.
In the default auto mode, Lunascope chooses a window that is
proportional to the selected annotation duration, so short events stay
visible without losing their local context and long events are shown
with a wider span.
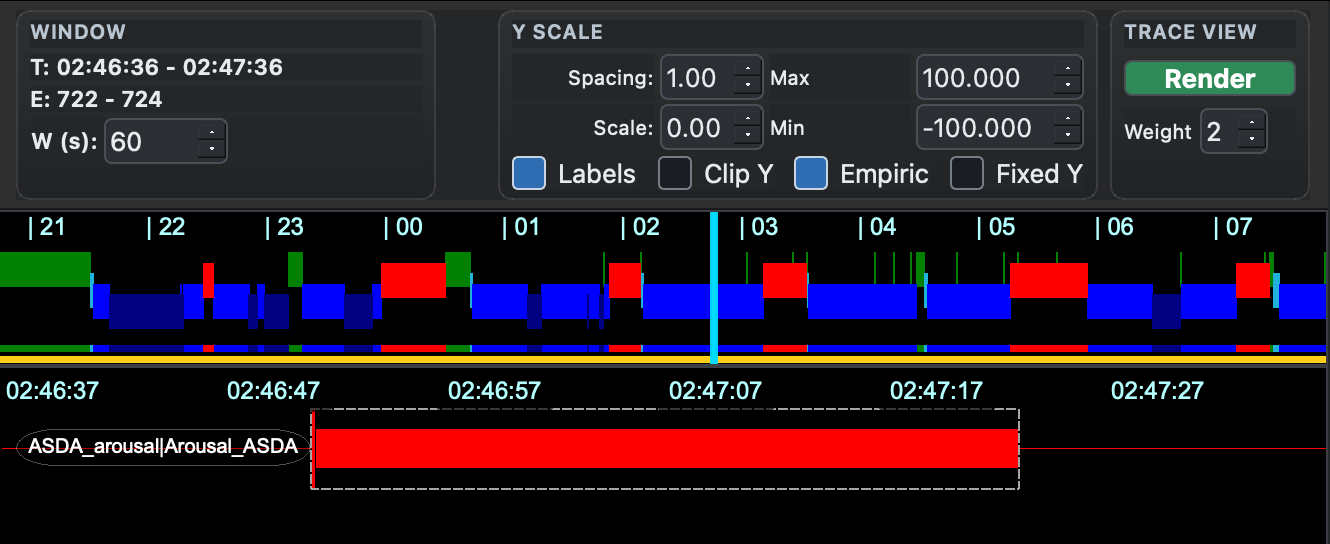
You can also set a fixed window size in seconds. For example, setting
W (s) to 60 shows a one-minute window around each selected event:
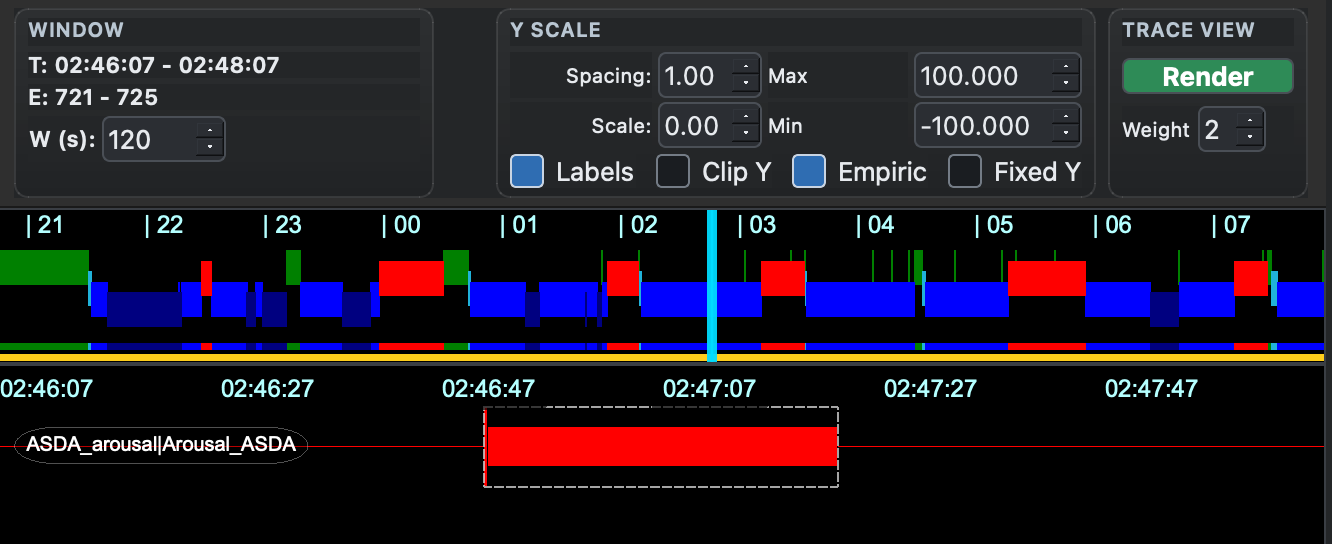
Increasing the value shows more context around the same selected event:
Annotation editor
Open the annotation editor with C-Shift-A, or from the Views
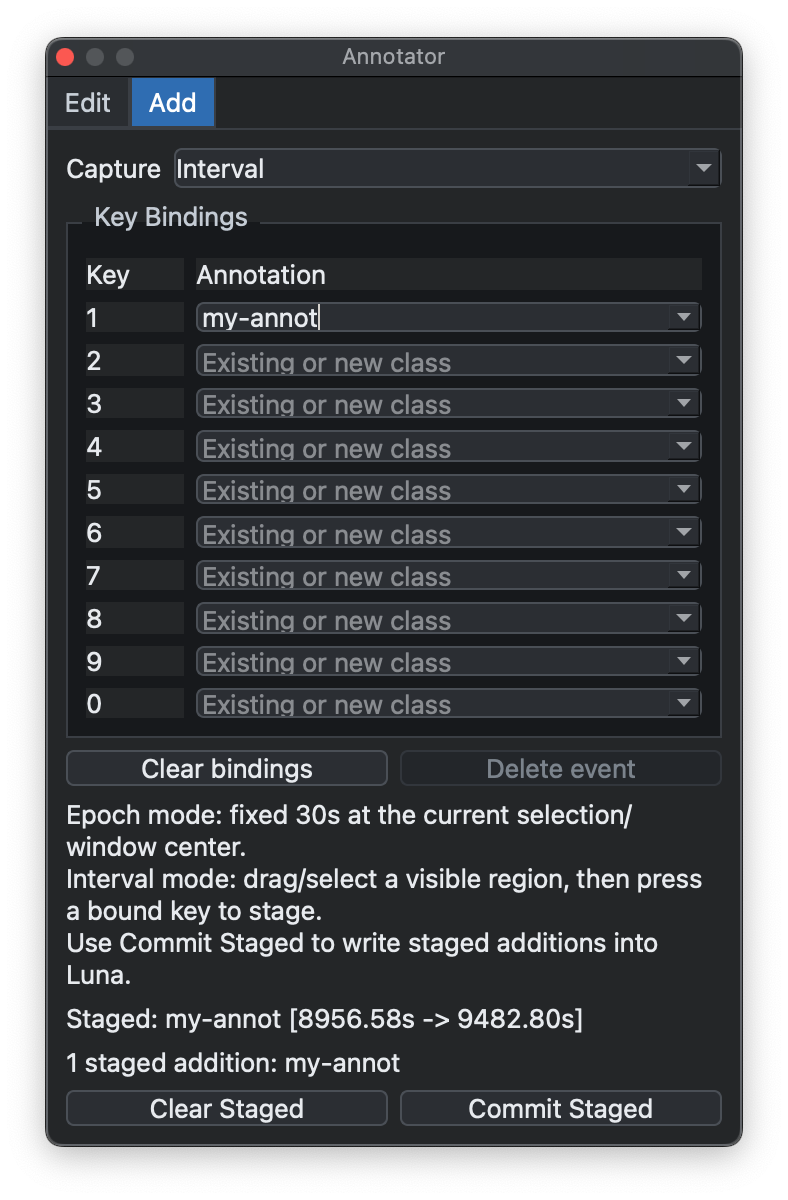
menu. It has two modes: Add for creating new annotations and Edit
for modifying existing ones.
In Add mode, first choose whether you want to capture a selected interval or a fixed 30-second epoch. Then bind one or more number keys to annotation classes. A binding can point to an existing class or to a new class name that you type into the table.
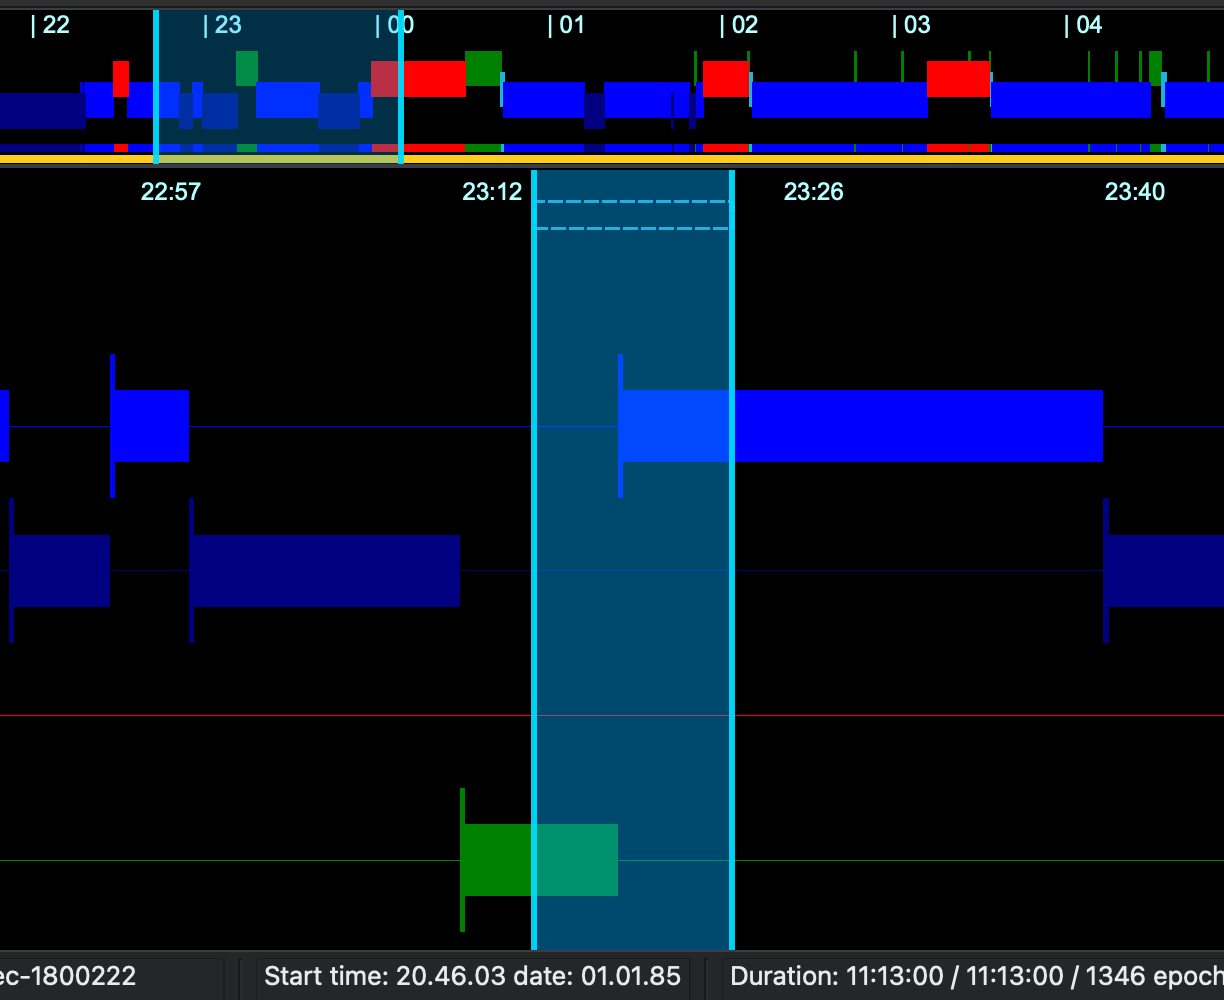
To add an interval annotation, drag across a region in the main viewer:
Then press the bound number key. Lunascope stages the new annotation but does not immediately write it to the underlying Luna data structure. The staged addition appears in the editor, where you can clear it or commit it:
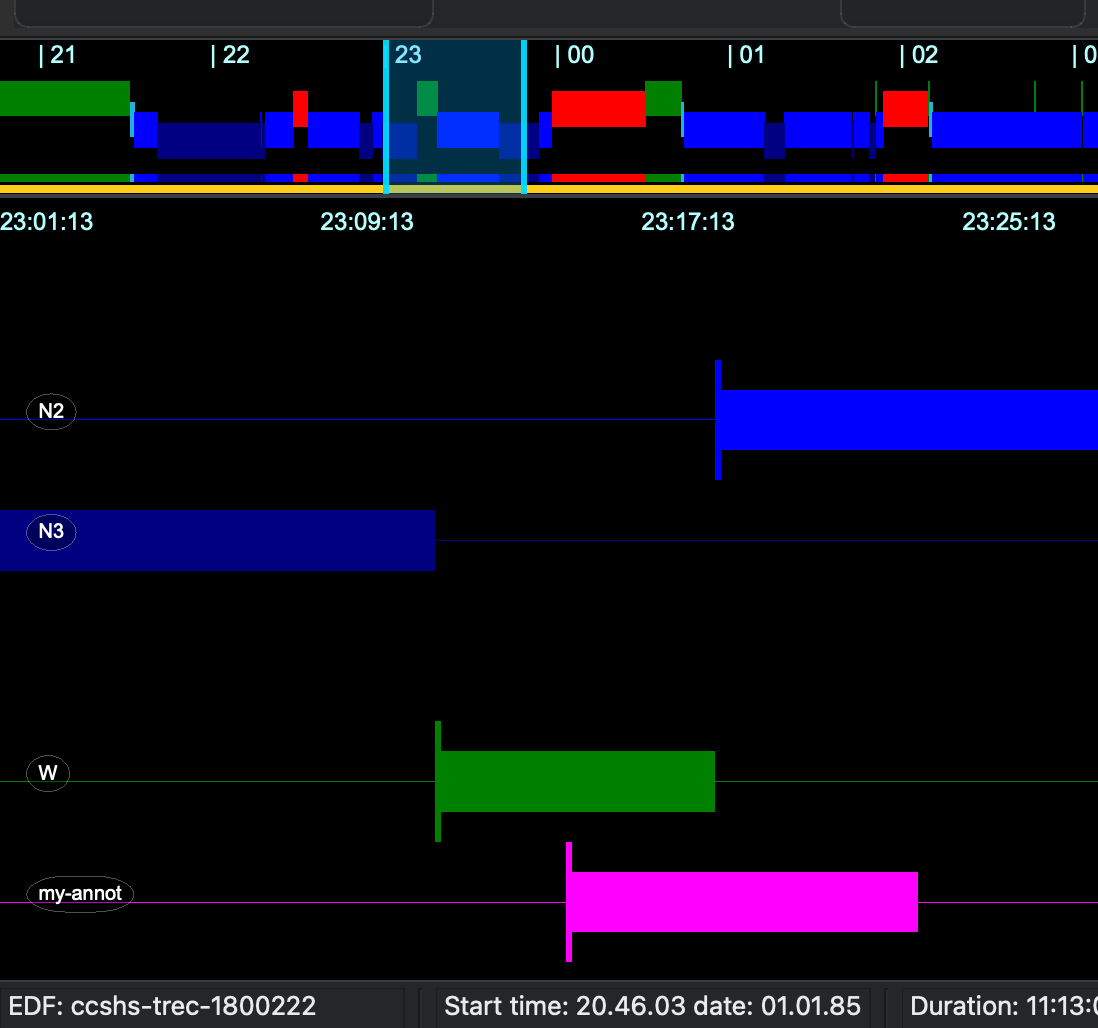
After committing, the new annotation appears in the viewer as a normal annotation track:
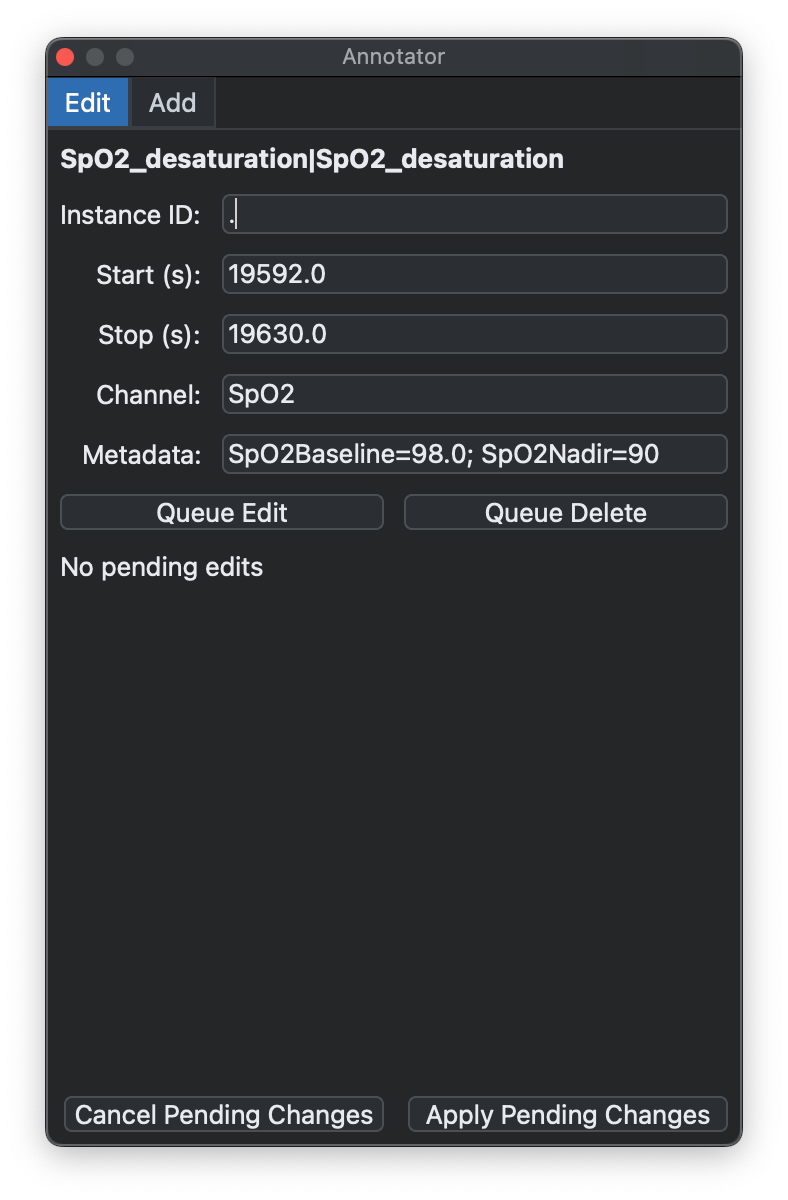
In Edit mode, select an existing annotation instance from the viewer or the Instances table. The editor shows its class, instance ID, start and stop times, channel, and metadata:
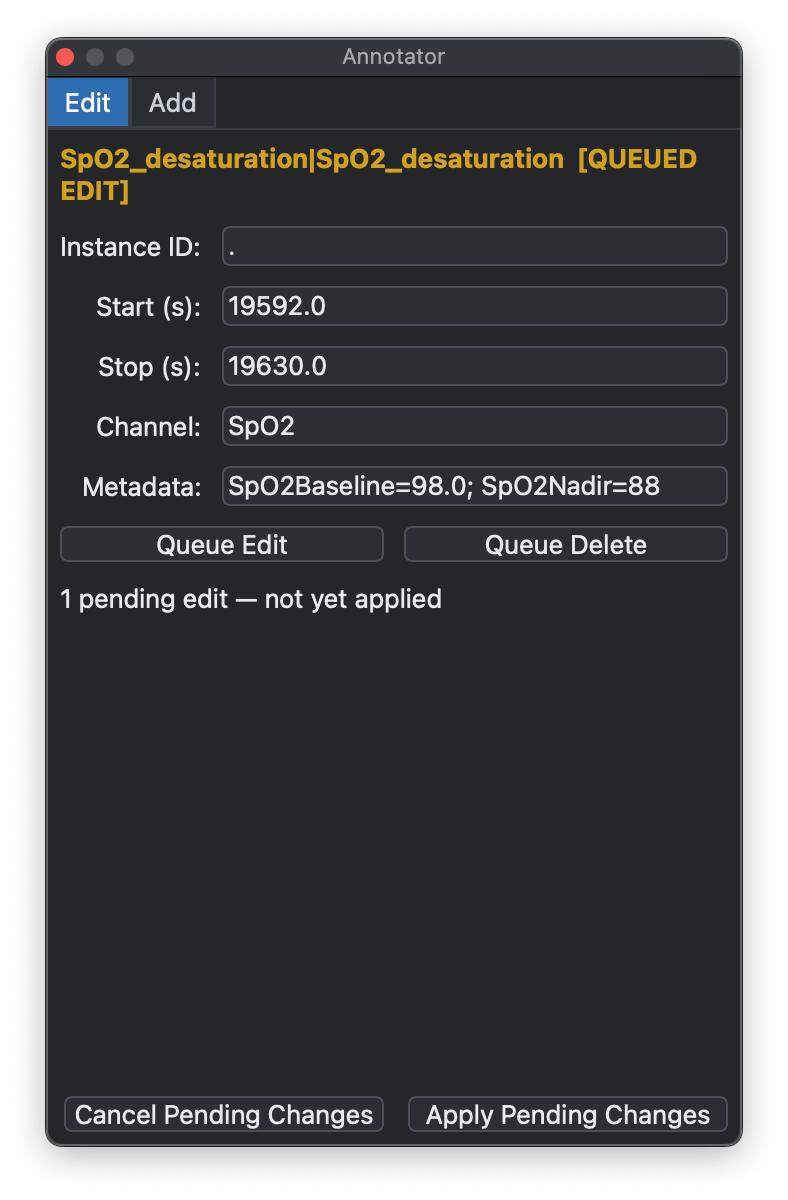
You can edit the fields directly, for example to adjust timing or change event metadata, and then choose Queue Edit. Queued changes are marked as pending until you apply them:
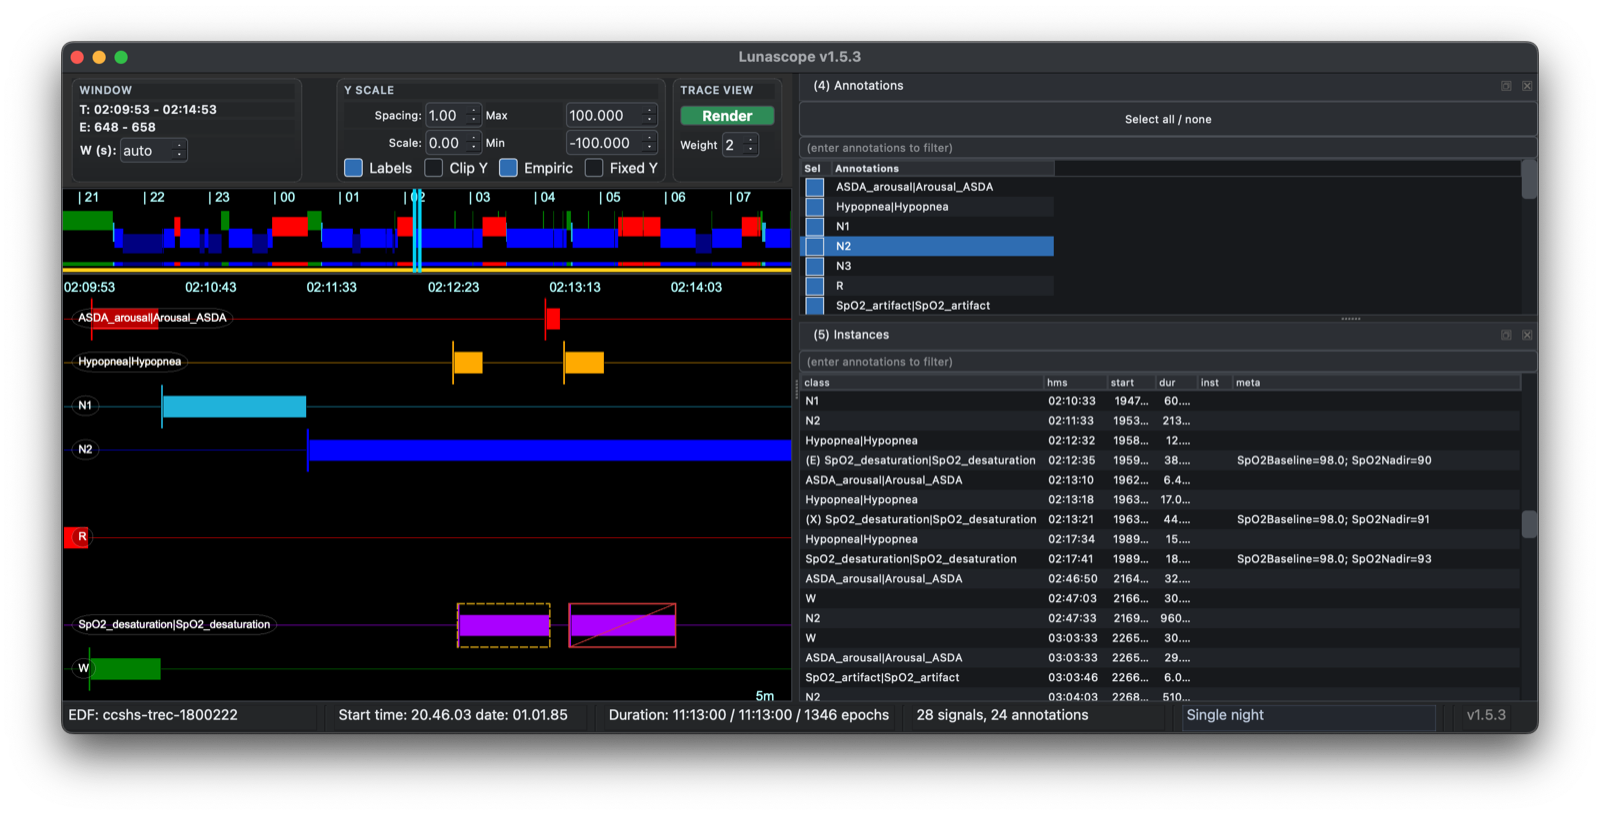
Pending edits are also indicated in the main interface, so you can review the affected annotation before committing the change:
You can queue deletions in the same way. A queued deletion is displayed separately from a queued edit, making it possible to inspect pending changes before they are applied:
Finally, choose Apply Pending Changes to write the queued edits or deletions back into the current Luna annotation set. Until you apply them, you can cancel the pending changes and return to the original annotations:

Previous: Signals | Next: Spectrograms